
Streaming Device Setup Tips for Beginners: The Ultimate Performance Guide
Setting up a new streaming device should be an exciting moment. You are unlocking a massive world of movies, live sports, television shows, and international content right at your fingertips. However, for many beginners, the initial configuration process can quickly become overwhelming. From managing tangled cables and resolving unexpected audio-video sync issues to troubleshooting dropped Wi-Fi connections, a lot can go sideways.
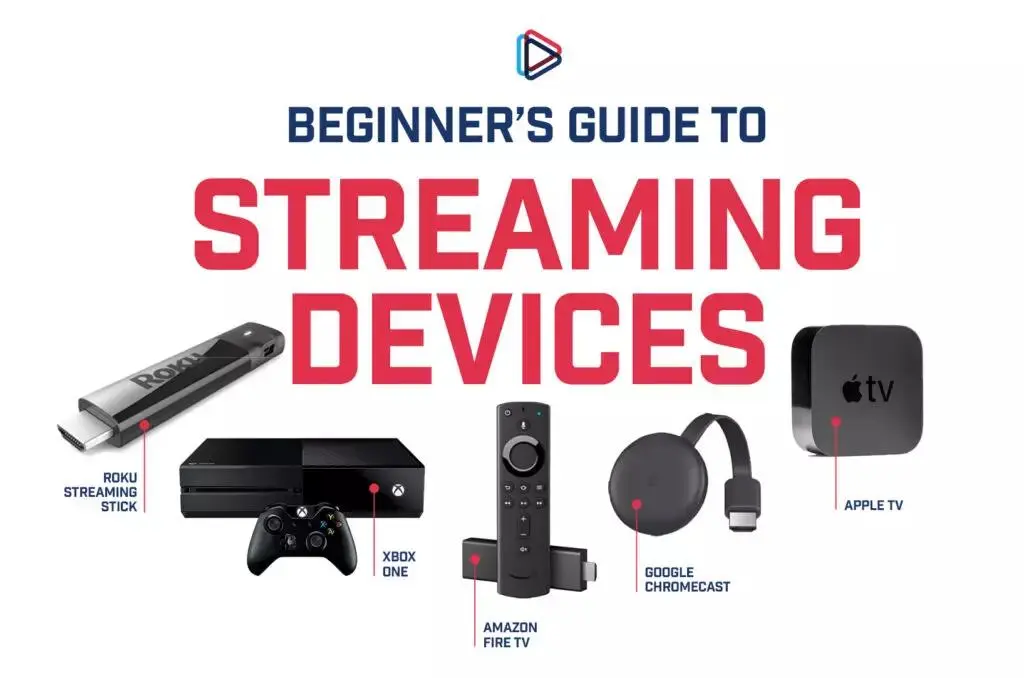
This comprehensive guide will walk you through everything you need to know about setting up your new hardware. Whether you are installing a Roku, Amazon Fire TV Stick, Apple TV, Chromecast, or an Android TV box, these beginner-friendly streaming device setup tips will ensure you get maximum performance, pristine picture quality, and a headache-free installation from day one.
Quick Start Streaming Setup Checklist
If you want to get up and running as quickly as possible without missing any crucial steps, use this high-level streaming setup checklist. We will dive deeper into each of these phases throughout this guide.
- Unbox & Verify: Confirm you have the streaming media player, remote control, batteries, power adapter, and an HDMI cable.
- Check Ports: Locate an open HDMI port on your television and a nearby wall power outlet.
- Audit Network Speed: Run a quick internet speed test on your smartphone near your TV to ensure you have at least 25 Mbps for 4K streaming.
- Gather Credentials: Have your home Wi-Fi network name (SSID) and password ready, along with any platform account details (e.g., Amazon, Google, or Apple IDs).
- Physical Connection: Plug the device into the TV’s HDMI port and connect it directly to wall power.
- Input Alignment: Turn on your TV and switch the input source to match the corresponding HDMI port.
- On-Screen Walkthrough: Follow the on-screen prompts to pair your remote, select your language, and connect to Wi-Fi.
- Update Firmware: Allow the system to download and install the latest software updates before installing apps.
- Install Core Applications: Download your preferred streaming services and configurations. If you are configuring advanced or international packages, refer to specialized documentation like the Blue Shark IPTV Setup Guide for specific portal paths.
- Optimize Display Settings: Adjust your device’s resolution settings to match your television’s native capabilities (HD vs. 4K).
Phase 1: Device Preparation & Physical Installation
The foundation of a flawless streaming experience is a proper physical setup. Skipping small details here—like using the wrong power source—can cause random device reboots and stuttering video later on.
Understanding Your Hardware Form Factor
Streaming devices generally fall into two categories: streaming sticks and set-top boxes.
Streaming sticks (like the Amazon Fire TV Stick or Roku Streaming Stick) plug directly into your TV’s HDMI port and hide completely out of sight. Set-top boxes (like the Apple TV 4K or Nvidia Shield TV) sit on your media console and connect to the TV via a standalone HDMI cable.
Step-by-Step Physical Setup
Follow this strict order of operations to prevent component strain or electrical surges:
- Examine your TV’s HDMI Ports: Look closely at the labels next to the HDMI slots on the back or side of your television. If you own a 4K television, look for ports labeled 4K@60Hz, HDCP 2.2, or eARC/ARC. Plugging a 4K streaming stick into an older HDMI 1.4 port will artificially limit your resolution to 1080p.
- Connect to the HDMI Port: Insert the streaming stick directly into the slot. If space is tight or the chassis of the stick blocks adjacent ports, use the short HDMI extender cable that is often included in the box. For set-top boxes, connect a high-speed HDMI 2.0 or HDMI 2.1 cable from the box output to the TV input.
- Establish Proper Power Connections: This is where many beginners make their first critical mistake. Almost all streaming sticks feature a USB power cable. It is incredibly tempting to plug this USB cable directly into an open USB port on the back of your TV. Do not do this. Most TV USB ports only supply 0.5 amps of power, which is insufficient for modern streaming hardware. When the device tries to stream heavy 4K video files or process graphic-heavy menus, it will brownout, leading to sudden boot loops, system crashes, and corrupted data. Instead, always plug the USB cable into the dedicated wall power adapter that came with your device, and plug that adapter into a standard electrical outlet.
- Prepare the Remote Control: Slide open the battery compartment on your remote control and insert the included batteries. Note whether your remote uses standard Infrared (IR) or Bluetooth/Wi-Fi Direct. IR remotes require a direct line of sight to the device, while wireless remotes can operate through cabinets and walls.
Phase 2: Network Preparation & Connectivity Optimization
No matter how powerful your streaming device is, its performance is entirely dependent on the quality of your home network. A weak or unstable network connection results in the ultimate streaming enemy: the buffering wheel.
The Bandwidth Breakdown
Before configuring your network connection, it is important to understand how much internet bandwidth different video qualities consume. Use this breakdown to audit your current home internet plan:
| Video Quality | Recommended Minimum Download Speed |
| Standard Definition (SD – 480p) | 3 Mbps |
| High Definition (HD – 1080p) | 5 to 10 Mbps |
| Ultra High Definition (4K UHD) | 25 Mbps |
| Live IPTV & High-Framerate Sports | 30+ Mbps (with low latency) |
Keep in mind that these numbers represent the bandwidth required per device. If you have multiple family members watching videos, playing games, or working from home simultaneously, your total household bandwidth must scale accordingly.
2.4 GHz vs. 5 GHz Wi-Fi Frequencies
Modern routers broadcast their wireless signals across two distinct frequency bands. Choosing the correct one during your streaming device configuration is critical:
- 2.4 GHz Band: This frequency travels much farther and can easily penetrate solid walls and floors. However, it is significantly slower and highly prone to interference from household electronics like microwaves, baby monitors, and wireless landline phones.
- 5 GHz Band: This frequency offers massive data pipelines and lightning-fast speeds, making it perfect for buffer-free 4K video. The trade-off is that it struggles to travel long distances and pass through thick walls.
The Optimization Rule: If your streaming device is located within 20 to 25 feet of your router with a relatively clear line of sight, always connect it to the 5 GHz network. If your TV is on a completely different floor or deep in a basement, the 2.4 GHz network may offer a more stable, drop-free connection despite the lower top speeds.
The Power of Hardwired Ethernet
If your streaming media box sits anywhere near your main internet router or a network switch, skip the wireless setup entirely. Connect a physical Cat6 Ethernet cable from your router directly into the device. Hardwired connections eliminate wireless interference completely, drop latency down to single-digit milliseconds, and provide a perfectly stable stream that will not dip when someone else uses the microwave.
Note for Small Sticks: If you are using a compact streaming stick that lacks an integrated Ethernet port, check online to see if the manufacturer sells an official Ethernet power adapter. This accessory allows you to run hardwired internet through the micro-USB or USB-C power input.
Phase 3: Initial Software Configuration & Account Syncing
With the hardware securely plugged in and your network optimized, it is time to turn on your television, switch the input source using your TV remote (usually via the “Source” or “Input” button), and begin the software setup.
Account Creation and Activation Security
When your streaming device boots up for the first time, it will guide you through picking a language and connecting to your Wi-Fi network. Once online, the system will require you to log in to a master platform account (an Amazon account for Fire TV, a Roku account, a Google account for Android/Google TV, or an Apple ID for Apple TV).
Be extremely cautious during this phase to avoid widespread activation scams.
Genuine streaming platforms will never charge you a fee to activate your hardware, nor will they display a phone number on your screen telling you to call a support line to unlock the device. If your device displays an activation code, it will direct you to visit a highly specific, secure URL on your computer or phone (such as [amazon.com/code](https://amazon.com/code) or [roku.com/link](https://roku.com/link)). Enter the code exactly as shown on your TV screen to securely bind the device to your personal account profile.
Dealing with Platform Firmware Updates
Immediately after account authentication, your device will check for system updates. Do not interrupt this process.
Even if you just bought the device brand new out of a retail box, it has likely sat in a warehouse for months. The firmware running out of the box is almost certainly outdated. Allowing the machine to download and apply the newest operating system patches ensures compatibility with the latest versions of streaming apps, fixes known security vulnerabilities, and optimizes system-level video decoding protocols. The unit may reboot multiple times during this process—let it finish completely until you are returned to the main dashboard.
Phase 4: 5 Common Streaming Setup Mistakes to Avoid
Even tech-savvy individuals often make subtle configuration errors that secretly degrade their viewing quality. Review this list of common pitfalls to ensure your system is free of hidden bottlenecks.
1. Burying the Device Behind the TV Chassis
If you are using a compact streaming stick plugged directly into the back of a wall-mounted TV, the massive metallic frame and electrical components of the television can act as an accidental shield, heavily degrading Wi-Fi signals. If you notice poor connection bars in your system settings, use an HDMI male-to-female extension cable to drop the stick slightly below or away from the TV frame, opening up a direct path to your wireless router.
2. Leaving Motion Smoothing Enabled on Your TV
This is an issue handled on your actual television settings rather than the streaming device itself, but it ruins the cinematic experience for millions of viewers. Television manufacturers often ship displays with features called “Motion Smoothing,” “Action Enhancement,” or “TruMotion” enabled by default. This technology artificially inserts fake frames into video files to make movement look ultra-fluid.
While helpful for live sports, it creates a jarring “Soap Opera Effect” on movies and prestige television dramas, making Hollywood film sets look cheap and unnatural. Go into your TV’s picture settings menu and disable any variation of motion smoothing for a proper cinematic experience.
3. Mixing Up Audio Passthrough Configurations
If you route your streaming setup through an external soundbar or a dedicated multi-channel home theater receiver, your streaming box needs to know how to handle audio data. Leaving the audio output setting on “Auto” or “PCM Stereo” often forces the streaming device to downmix immersive surround sound tracks into flat, two-channel stereo.
If you have a high-end sound system that supports Dolby Atmos or DTS:X, navigate to your streaming player’s audio settings and change the format output to Passthrough or Bitstream. This commands the device to send the raw audio file directly to your soundbar or receiver, allowing the specialized audio hardware to decode the native multi-channel surround sound exactly as the sound engineers intended.
4. Overlooking App Cache Accumulation
Streaming applications function like mini-web browsers; they constantly download artwork, thumbnails, trailer snippets, and temporary data to your device’s internal storage to make browsing menus feel faster. Over time, this data cache grows bloated, crowding the device’s limited internal flash memory. When free storage space drops below 1 GB, the overall operating system slows down significantly, resulting in jerky menu navigation and app crashes. Get in the habit of clearing app caches every few months.
5. Ignoring Regional Content Path Structures
When setting up advanced, premium international live TV packages or custom portals, beginners often struggle because they enter inaccurate server configurations or incomplete URLs. For instance, configuring global delivery streams or custom playlists requires precise endpoint formatting. If you find yourself facing black screens or connection errors when setting up advanced media engines, always review structured deployment documentation, such as the comprehensive Blue Shark IPTV Setup Guide, to verify that your directory paths, network access tokens, and portal configurations are perfectly aligned.
Phase 5: Advanced Optimization Tips for Maximum Performance
Once your device is running smoothly, you can apply several advanced optimization tweaks to wring every ounce of performance out of your hardware investment.
Match Frame Rate Controls
Movies are traditionally filmed at 24 frames per second (fps), while television broadcasts run at 30 fps or 60 fps. By default, most streaming devices output a static 60Hz signal, using a digital processing trick known as “3:2 pulldown” to stretch a 24 fps movie into a 60Hz container. This processing can introduce a subtle, jerky motion artifact known as judder, which is especially visible during slow pan shots across landscapes.
To fix this, go to your streaming device display settings and look for an option labeled Match Content Frame Rate or Real Cinema. When turned on, the streaming device will dynamically shift your television’s native refresh rate to perfectly match the frame rate of whatever video file is playing, resulting in judder-free, natural motion.
Force Manual Display Outputs
While the “Auto-Detect Resolution” feature works fine most of the time, it occasionally miscommunicates with your TV handshake protocols, locking your display output to 1080p even on a 4K set.
Manually navigate to your device’s display configuration menu and override the automatic settings. Explicitly choose 4K UHD @ 60Hz or 1080p Full HD, depending on your specific TV panel. This locks the video rendering pipeline to your television’s exact native pixel grid, preventing unnecessary upscaling artifacts.
Turn Off Background Diagnostic Tracking
Out of the box, devices from Amazon, Google, and Apple are configured to continuously log user behavior, app usage statistics, and error diagnostic logs, sending that data back to parent company servers in the background. This background telemetry consumes system processing power and network upload bandwidth.
Navigate deep into your platform’s Privacy or Privacy & Security settings menu. Toggle off features labeled “Share Usage Data,” “Device Diagnostics,” “Interest-Based Ads,” and “App Usage Tracking.” This frees up CPU cycles for smoother video decoding and declutters your network bandwidth.
Expand Storage with USB-OTG Cables
If you bought a compact streaming stick, you will likely run out of space after downloading a dozen apps. You can bypass this physical hardware limitation using a cheap accessory called a USB On-The-Go (OTG) Cable.
This specialized Y-splitter cable plugs into the micro-USB or USB-C power port of your streaming stick. One leg of the Y-cable connects to your standard wall power adapter, while the other leg provides a female USB-A slot. You can plug a standard USB flash drive into this slot, format it as internal storage within your device settings menu, and easily move heavy applications off the core hardware memory to free up system space.
Phase 6: Troubleshooting Common Streaming Issues
Even with an optimal setup, you will occasionally run into software freezes, network anomalies, or hardware handshaking errors. Here is a handy troubleshooting manual to resolve issues quickly.
What to Do When the Screen Goes Black
A sudden black screen usually points to an HDMI handshake failure. Digital Content Protection (HDCP) systems require your streaming device and television to continuously verify each other’s security certificates over the HDMI link. If this handshake breaks down, video output shuts off instantly.
- The Fix: Unplug the HDMI cable from both your streaming box and your TV. Wait 10 seconds to drain residual static charges, then firmly reseat the cable ends. If the screen remains black, try switching to a completely different physical HDMI port on the TV, or replace the HDMI cable entirely with a verified High-Speed HDMI cable.
Fixing Audio-Video Sync Issues
Few things are more frustrating than watching a movie where a character’s lips move out of sync with the audio track. This delay happens when your television or soundbar takes longer to process complex audio formats than it does to display the video track.
- The Fix: Go to the audio settings menu of your streaming device or your television and look for a setting named Audio Delay, Lip Sync Adjustment, or AV Sync. This setting gives you a slider tool that allows you to delay or advance the audio track by milliseconds until it perfectly aligns with the on-screen action.
Resolving Constant App Crashes
If a specific application constantly freezes, drops you back to the home screen, or hangs on an opening logo, the local app state has likely become corrupted.
- The Fix: Do not just reboot the entire machine. Instead, navigate to your platform’s Settings > Applications > Managed Installed Applications menu. Select the problematic app, choose Force Stop to clear it from active RAM, and then click Clear Cache. If the app continues to crash upon relaunch, select Uninstall, restart your streaming media player, and reinstall a clean copy of the application from the official App Store.
Frequently Asked Questions (FAQs)
1. Do I need to pay a monthly subscription fee to use a streaming device?
No. Owning and operating the physical streaming device itself is completely free after your initial retail purchase. While the master operating system and free ad-supported channels (like Pluto TV, The Roku Channel, and Tubi) do not cost anything, accessing premium applications (such as Netflix, Disney+, Max, or live IPTV providers) requires purchasing separate, independent service subscriptions.
2. Can I use a streaming device on an older television that lacks HDMI ports?
Yes, but you will need an external hardware adapter. You can buy an HDMI to RCA Converter or an HDMI to Component Converter online. This adapter plugs into the HDMI output of your streaming device, processes the digital signal, and converts it into the analog red, white, and yellow video cables that fit into older analog cathode-ray tube (CRT) or early flat-panel televisions.
3. Is it safe to leave my streaming device plugged in and powered on all night?
Yes. Modern streaming devices are designed to enter an ultra-low-power “Sleep Mode” or “Standby Mode” automatically when your television is turned off or when no video activity is detected for a set period. They use minimal electricity in this state while remaining online in the background to quietly download app updates during the middle of the night.
4. How often should I manually reboot my streaming device?
As a general rule of thumb, you should perform a software restart once every two weeks. Over days of continuous use, tiny fragments of code from closed applications can remain stuck inside your system’s random-access memory (RAM), causing gradual performance drops. A clean system reboot flushes the RAM completely, restoring original performance.
5. Why can’t my streaming device find my home 5 GHz Wi-Fi network?
This typically happens because your home router is broadcasting its 5 GHz signal on a set of dynamic channels known as DFS (Dynamic Frequency Selection) channels. Some streaming media sticks lack the radio hardware certification to scan DFS wireless bands. To fix this, log in to your home router’s admin dashboard on a computer web browser, go to wireless settings, and manually lock your 5 GHz channel to a standard non-DFS band, such as channel 36, 40, 44, or 48.
6. Can I take my streaming device with me when traveling or staying at a hotel?
Absolutely. Modern streaming sticks are built for portability. When you plug your device into a hotel room TV, it will boot up normally. When you attempt to connect to the hotel’s guest Wi-Fi network, a special window called a Captive Portal will usually pop up on your screen, allowing you to enter your room number, hotel password, or accept guest terms using your remote control.
7. What is the difference between a streaming stick and a smart TV?
A Smart TV has a streaming operating system built directly into its internal motherboard. A streaming stick or box is an external standalone computer that plugs into an open input port. External streaming devices are almost always faster, receive software updates for many more years, and boast more powerful processors than the cheap smart platforms built natively inside budget televisions.
8. Do I need a 4K streaming device if I only own a standard 1080p television?
Yes, buying a 4K device is highly recommended even for a 1080p television. 4K streaming players feature vastly superior internal processors, upgraded Wi-Fi antennas, and more RAM than basic 1080p models. Purchasing a 4K model ensures your system menus feel fast and smooth, and it keeps your hardware future-proof if you upgrade your TV later on.
9. Why does my video look clear at first but then suddenly turn blurry?
This visual shift is caused by a system feature known as Adaptive Bitrate Streaming. Streaming applications monitor your home network speeds in real time. If your Wi-Fi signal drops or someone else on your network starts a heavy download, the app will instantly drop your video resolution down to a lower, blurry quality rather than stopping the video completely to buffer. This is a clear indicator that your local network connection is unstable or experiencing heavy congestion.
10. Can I control my streaming stick using my smartphone instead of the remote?
Yes. Every major hardware ecosystem offers a free, official remote control app downloadable on iOS and Android smartphones (e.g., the Google Home app, Roku app, or Amazon Fire TV app). Once your smartphone and your streaming device are connected to the exact same home Wi-Fi network, the app acts as a fully functional trackpad and keyboard, making typing long passwords incredibly easy.
Conclusion: Elevate Your Home Entertainment Experience
Setting up a brand-new streaming device does not have to be a frustrating trial-and-error experience. By following this structured streaming device setup guide, you can confidently navigate the installation process like an absolute pro.
Always prioritize using dedicated wall power over television USB ports, choose the 5 GHz Wi-Fi band to give your device a fast lane for data, and keep your software environment clean by regularly clearing out your application cache files. Avoiding these common setup mistakes transforms your entertainment center into a high-performance streaming powerhouse.
Now that your physical connections are secure, your settings are optimized, and your network bottlenecks are gone, you are ready to explore your favorite content libraries with zero buffering and pristine picture quality. Happy streaming!