
Quick Optimization Checklist
If you are looking for an immediate fix to stop buffering or boost your video resolution right now, run through this quick checklist before diving into our deep-dive guide:
- [ ] Power Cycle Everything: Unplug your router, modem, and streaming device for 30 seconds, then plug them back in.
- [ ] Switch to a 5 GHz Wi-Fi Band: Ensure your streaming device is connected to the 5 GHz band rather than the slower, crowded 2.4 GHz band.
- [ ] Disconnect Unused Devices: Pause downloads, cloud backups, or online gaming on other devices sharing your network.
- [ ] Close Background Apps: Force-close unused applications running in the background on your Smart TV, streaming stick, or computer.
- [ ] Hardwire with Ethernet: Whenever possible, bypass Wi-Fi entirely and connect your streaming device directly to your router using a Cat6 Ethernet cable.
- [ ] Check Your Speed: Run a speed test to ensure your internet service provider (ISP) is delivering the bandwidth you pay for.
Introduction: Why Streaming Quality Optimization Matters
Few things are more frustrating than settling in to watch your favorite live sports event, a cinematic movie, or a highly anticipated TV show, only to be met with the dreaded spinning loading wheel. In the age of 4K Ultra HD and high-framerate HDR broadcasting, achieving pristine playback requires more than just a fast internet package. It requires a fundamental understanding of streaming quality optimization.
Whether you are a casual cord-cutter or a power user relying on premium IPTV networks like Blue Shark IPTV, the quality of your stream is determined by an entire ecosystem of moving parts: your home network topology, your router configurations, your device’s processing hardware, and even your software settings.
When any link in this chain fails, you experience:
- Buffering: The video pauses completely while your device waits for more data to load into its memory buffer.
- Pixelation & Resolution Drops: The video image becomes blurry, blocky, or downscales from 1080p/4K to a muddy 480p as the player tries to prevent a total freeze.
- Audio-Video Desync: The audio track falls out of time with the actors’ lips or the on-screen action.
- Frequent Disconnections: The stream cuts out entirely, throwing error codes or failing to load the channel playlist.
This comprehensive guide is designed to strip away the guesswork. By implementing the advanced network adjustments, device configurations, and troubleshooting protocols detailed below, you will unlock the true potential of your hardware, reduce buffering to zero, and consistently enjoy smooth, high-fidelity playback.
Section 1: Understanding the Basics of Video Streaming
Before we can optimize our setup, we must understand the core mechanics of how video data travels from a remote server to your living room screen.
The Mechanics of Bitrates and Resolutions
Digital video is broken down into millions of tiny data packets. The size and speed of these packets are measured by bitrate—the amount of data processed over a specific period, typically quantified in Megabits per second (Mbps).
Higher resolutions require significantly higher bitrates because they contain vastly more visual information. For example, a single frame of a 4K UHD video contains four times as many pixels as a standard 1080p Full HD frame. If your network cannot maintain the delivery speed required by that bitrate, the player must alter its behavior to keep the broadcast alive.
Adaptive Bitrate Streaming (ABR)
Most modern media players and premium platforms utilize a technology called Adaptive Bitrate Streaming (ABR). When you launch a stream, the source server provides the player with a manifest file containing multiple quality tiers of the same video (e.g., 480p, 720p, 1080p, and 4K).
As the video plays, the application constantly monitors your network’s download speed and latency.
- If your bandwidth is high and stable, the player requests the highest quality fragments.
- If your neighbor starts downloading a massive file or your Wi-Fi signal drops momentarily, the player detects the bottleneck and immediately drops down to a lower-resolution tier to prevent the video from stopping completely.
When a network fluctuates wildly, the ABR engine swings violently between high and low resolutions, leading to an inconsistent, irritating viewing experience. Our goal with streaming quality improvement is to stabilize this environment so the ABR engine locks onto the highest possible tier and stays there.
Section 2: Network Optimization for Flawless Playback
Your local home network is the single most common point of failure for media streaming. You can buy the most expensive Smart TV on the market, but if your local network architecture is flawed, your streams will suffer.
1. Bandwidth Demands: How Much Speed Do You Really Need?
Internet Service Providers love to sell massive gigabit packages, but you don’t necessarily need a 1000 Mbps connection to enjoy buffer-free streaming. What you do need is a consistent, unthrottled minimum speed dedicated strictly to your streaming activities.
Here is a breakdown of the standard sustained bandwidth requirements per single stream:
| Video Resolution | Recommended Minimum Speed | Ideal Speed (Accounting for Network Fluctuations) |
|---|---|---|
| Standard Definition (480p) | 3 Mbps | 5 Mbps |
| High Definition (720p) | 5 Mbps | 8 Mbps |
| Full High Definition (1080p) | 10 Mbps | 15 Mbps |
| 4K Ultra HD / HDR | 25 Mbps | 40+ Mbps |
Crucial Note: These numbers represent the bandwidth required per active device. If you have a family member streaming 4K in the living room, another playing online video games in the bedroom, and smart security cameras uploading footage to the cloud, your baseline household demand multiplies exponentially.
2. The Golden Rule: Ethernet vs. Wi-Fi
While Wi-Fi is incredibly convenient, it is fundamentally an unshielded, half-duplex medium prone to environmental interference, signal attenuation, and packet loss. For high-bandwidth applications like live IPTV or raw 4K Blu-Ray rips, an Ethernet cable is always superior.
Why Ethernet Wins:
- Zero Interference: Solid copper wiring protects the data packets from electromagnetic interference caused by household appliances, microwaves, and neighboring Wi-Fi networks.
- Full-Duplex Communication: Ethernet can send and receive data at the same time without delay, whereas Wi-Fi must constantly alternate between sending and receiving.
- Ultra-Low Latency: Reduces local ping times to less than 1ms, preventing buffer delays during live broadcasts.
If your streaming box (such as an Apple TV 4K, Nvidia Shield Pro, or a dedicated IPTV receiver) is located within 50 feet of your router, run a Cat6 or Cat7 Ethernet cable. It is the single most impactful optimize streaming performance upgrade you can make.
3. Conquering Wi-Fi: Placement, Bands, and Mesh Systems
If running an Ethernet cable is physically impossible due to the layout of your home, you must optimize your wireless environment to minimize signal degradation.
The 2.4 GHz vs. 5 GHz Dilemma
Modern routers broadcast on at least two distinct frequency bands. Choosing the correct one for your streaming device is critical:
- 2.4 GHz Band: Travels longer distances and penetrates thick walls easily, but it has limited bandwidth capacity (often capping out around 50–100 Mbps in real-world scenarios) and is deeply congested by Bluetooth devices, baby monitors, and your neighbors’ networks. Avoid this band for 4K streaming.
- 5 GHz Band: Offers massive bandwidth capabilities and suffers from very little congestion. However, it has a shorter effective range and struggles to penetrate solid walls, brick chimneys, or heavy furniture. Always connect your streaming devices to the 5 GHz band.
[Router] —-(High Speed / Short Range / 5GHz)—-> [Streaming Device Nearby]
[Router] –(Lower Speed / Long Range / 2.4GHz)—> [Distant Smart Home Device]
Router Physical Placement
Do not hide your wireless router inside a closed wooden entertainment center, behind your television, or on the floor in the corner of a basement.
- Position the router centrally within your living space.
- Elevate it on a shelf or wall mount to allow the radio waves to radiate downward and outward across open spaces.
- Keep it clear of large metallic objects, mirrors, and thick concrete walls which reflect or absorb Wi-Fi signals.
Implementing a Mesh Wi-Fi Network
If you live in a large, multi-story home, a single traditional router will inevitably leave wireless “dead zones.” Rather than using cheap Wi-Fi extenders (which cut your available bandwidth in half by creating separate, inefficient relay networks), invest in a Mesh Wi-Fi System (such as Eero, Google Nest Wi-Fi, or TP-Link Deco).
Mesh nodes communicate with each other using a dedicated wireless backhaul or wired ethernet backhaul, blanketing your entire property in a single, seamless Wi-Fi fabric. When your streaming device connects to a nearby mesh node, it enjoys full signal strength and maximum throughput.
Section 3: Advanced Router Configurations
Often, the default settings applied by your ISP on your modem-router combo unit are heavily restricted or unoptimized for high-density video streaming. By accessing your router’s administrative console, you can unlock hidden performance.
How to Access Your Router’s Admin Panel
- Locate your router’s IP address (typically
192.168.1.1or192.168.0.1) printed on a sticker on the back of the device, along with the default admin username and password. - Open a web browser on a computer or smartphone connected to your network and type that IP address into the URL bar.
- Enter your credentials to access the internal firmware settings.
Quality of Service (QoS): Prioritizing Your Video Streams
By default, your router treats all network traffic equally. A packet containing a data backup from a smartphone is processed with the same urgency as a live video frame from your IPTV subscription. If someone downloads a massive game update on a PC, it can starve your streaming device of bandwidth.
Quality of Service (QoS) allows you to re-program your router to prioritize specific traffic.
Without QoS:
[Bulk Downloads] \
[Web Browsing] —–> [Unoptimized Router] —–> Congestion & Buffering
[Live Streaming] /
With QoS Enabled:
[Live Streaming] —–> (High Priority) —-> [Optimized Router] —–> Smooth Playback
[Bulk Downloads] —–> (Low Priority) —-> [Optimized Router] —–> Delayed Until Free
Step-by-Step QoS Configuration:
- Navigate to the Advanced, Network, or Traffic Management tab in your router’s panel and search for QoS or Bandwidth Priority.
- Enable the QoS feature.
- If your router uses Device-Based QoS, locate your streaming hardware (e.g., Firestick, Apple TV, Smart TV) from the listed network clients and change its priority status from “Normal” to “High” or “Highest”.
- If your router uses Application-Based QoS, look for presets labeled “Media Streaming”, “Video”, or “IPTV” and turn them on.
- Save your settings and reboot the router. Now, your router will automatically throttle background downloads to ensure your video player gets the precise bandwidth it demands.
Optimizing Wi-Fi Channels and Widths
Wireless networks operate on specific “channels” within the radio spectrum. If multiple routers in an apartment complex or neighborhood are broadcasting on the exact same channel, the resulting overlap creates heavy packet loss.
Finding an Open Channel
Use a free mobile app like Wi-Fi Analyzer (Android) or the built-in Wireless Diagnostics tool on a Mac to scan your local airspace. Identify which channels are heavily populated and which ones are empty.
Manual Configuration:
- For the 2.4 GHz band, only use channels 1, 6, or 11. These are the only three channels that do not overlap with one another.
- For the 5 GHz band, select less crowded channels (such as channels 36, 40, 44, or 48). If your equipment supports DFS (Dynamic Frequency Selection) channels, enabling it can unlock entirely empty military/radar bands, providing an incredibly clean streaming environment.
- Set your 5 GHz Channel Width to 40 MHz or 80 MHz. While a wider 80 MHz channel allows for faster data transfers, it can be more susceptible to interference. If you live in a dense urban environment, scaling down to a highly stable 40 MHz width can permanently fix intermittent dropouts.
Customizing Your DNS Settings
Your Domain Name System (DNS) server acts as the phonebook of the internet, translating text URLs into numerical IP addresses. By default, your device uses your ISP’s local DNS servers, which are frequently slow, poorly maintained, and prone to routing errors that introduce latency before your stream even begins.
Changing your router’s global DNS settings to a premium, lightning-fast public provider can significantly reduce connection times when launching a channel or video file.
Recommended Public DNS Servers:
- Cloudflare DNS: * Primary:
1.1.1.1 - Secondary:
1.0.0.1 - Google Public DNS: * Primary:
8.8.8.8 - Secondary:
8.8.4.4
Locate the LAN or WAN Settings in your router dashboard, find the DNS Server fields, select “Manual” configuration, enter the Cloudflare or Google addresses, and save.
Section 4: Device Optimization Strategy
Even if you have a blazing-fast internet connection, if your streaming hardware is bogged down by low storage, bloated caches, or thermal throttling, your video quality optimization efforts will fall short.
1. Hardware Power Houses: Selecting the Right Device
Not all streaming devices are created equal. Low-cost streaming sticks often feature weak processors and tiny RAM allocations that struggle to decode compressed, modern video codecs smoothly.
If you are experiencing consistent issues on a cheap or aging device, consider upgrading to a robust media player. Refer to the table below to see how popular platforms stack up for high-demand video environments:
| Device | Processing Power | Network Connectivity | Best Suited For |
|---|---|---|---|
| Nvidia Shield TV Pro | Elite (Tegra X1+) | Gigabit Ethernet + Wi-Fi 5 | Premium 4K HDR, Dolby Vision, Advanced IPTV players |
| Apple TV 4K (Wi-Fi + Ethernet) | High (A15 Bionic) | Gigabit Ethernet + Wi-Fi 6 | Ultra-smooth user interface, high-end ecosystem integration |
| Amazon Fire TV Stick 4K Max | Mid-High | Wi-Fi 6E (Ethernet requires adapter) | Excellent budget-friendly performance, portable |
| Built-in Smart TV Apps | Low to Mid | Frequently capped at 100 Mbps Ethernet | Casual streaming (Often suffers from slow UI and lack of updates) |
2. Software Maintenance: Clearing Cache and Closing Background Apps
Streaming operating systems like Android TV, Fire OS, and tvOS function just like computers. Over time, apps leave behind temporary cache files that fill up the device’s internal flash storage. When storage drops below 1 GB, system memory becomes fragmented, causing extreme stuttering during media playback.
Clearing Cache on Amazon Fire TV / Android TV Devices:
- Open the Settings menu from the home screen.
- Select Applications, then choose Manage Installed Applications.
- Scroll through your list and select your preferred media applications (e.g., your IPTV app, Netflix, YouTube).
- Click Clear Cache (Do not click “Clear Data” unless you want to wipe your login credentials and start fresh).
- Repeat this process for system apps that accumulate clutter, such as web browsers and screensavers.
[Settings] -> [Applications] -> [Manage Applications] -> [Select App] -> [Clear Cache]
Force-Closing Background Apps
When you press the Home button on your remote control, most streaming applications do not actually close. Instead, they freeze in a background standby mode, continuously draining available RAM.
- On Android TV/Fire OS, install a utility tool like Background Apps & Process List from the app store to view and force-close all dormant software in one tap.
- On Apple TV, double-click the TV/Home button on your Siri Remote to bring up the App Switcher, then swipe up on the app previews to close them completely.
3. Firmware and App Updates
App developers and hardware manufacturers constantly push updates designed to optimize decoding efficiency, patch memory leaks, and improve security.
- Check your device’s System Update menu regularly.
- Ensure your video player applications are set to Auto-Update via their respective app stores.
- For advanced setups, periodically visit the official Blue Shark IPTV Support page to download recommended versions of compatible apps optimized specifically for their servers.
Section 5: Fine-Tuning App Settings for Video Quality Optimization
The software player you use to decode your video streams contains internal configuration parameters that can completely change how smoothly video data renders on your panel.
Understanding Hardware (HW) vs. Software (SW) Decoding
When an app plays a stream, it has to unpack highly compressed data formats (like H.264, HEVC/H.265, or AV1). It can do this in two ways:
- Hardware (HW) Decoding: The app passes the video data directly to the device’s dedicated graphic processing chips. This is incredibly fast, efficient, saves power, and guarantees smooth video rendering.
- Software (SW) Decoding: The app forces the main CPU to manually calculate the video geometry using software algorithms. This places an immense burden on the processor, frequently leading to dropped frames, skipped audio, and overheating.
Go into the internal Playback Settings or Decoder Settings of your chosen media player (such as TiviMate, XCIPTV, or VLC) and verify that Hardware Decoding (HW or HW+) is turned on for both Live Streams and Video-on-Demand (VOD) content.
Adjusting Buffer Size / Buffer Time
Counterintuitively, a larger buffer size is not always better.
- If your buffer size is set to Very Large (e.g., 10–15 seconds of pre-buffered data), the video may take a long time to start up initially, and shifting channels will feel sluggish. However, if your network is highly unstable, this large reservoir will keep the video playing smoothly through major dips.
- If your buffer size is set to None or Small, the video starts instantly, but the slightest hiccup in data delivery will cause an immediate freeze.
Pro Tip: For highly stable wired connections, set your media player’s buffer to None or Normal (0.5 to 1 second) for an instant, zippy channel-surfing experience. If you are stuck using an unstable Wi-Fi connection, increase the buffer size to Medium (3 to 5 seconds) to establish a reliable safety cushion against dropped packets.
Section 6: Performance Monitoring: Testing Your Real-World Speeds
You cannot optimize what you do not measure. If you are experiencing poor performance, don’t rely blindly on the internet package numbers on your monthly bill. You must test the actual bandwidth reaching your specific streaming hardware.
Running a Focused Speed Test
Do not run a standard speed test from a computer in your office and assume it applies to the TV in your bedroom. Instead, download a dedicated web browser or speed testing utility app (like Ookla Speedtest or Analiti) directly onto your streaming box.
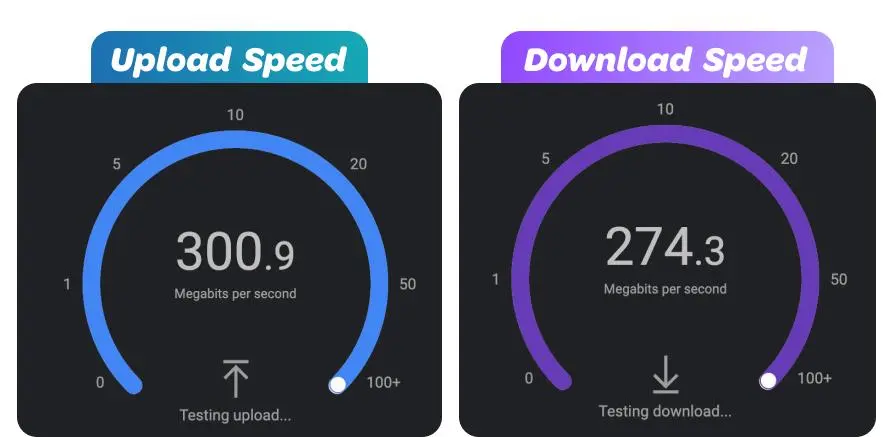
When interpreting your speed test results, watch out for these three critical metrics:
- Download Speed: Measured in Mbps. This dictates whether you can handle 4K or 1080p feeds. Ensure it meets the thresholds listed in our Network Optimization section.
- Ping (Latency): Measured in milliseconds (ms). This represents the round-trip time it takes for a signal to leave your home, reach a server, and return. For live interactive streaming, an internal ping of under 50ms is ideal.
- Jitter: This measures the variance in your ping times over time. High jitter indicates a highly erratic, unstable network connection. Your jitter score should ideally be under 5ms. High jitter is a prime indicator of impending packet drops and buffering loops.
Section 7: Troubleshooting and ISP Throttling
You have optimized your network, upgraded your device, cleared your caches, and set your router up perfectly—yet, at 8:00 PM on a Saturday, your streaming quality plunges off a cliff. What is going on?
The Reality of ISP Throttling
During peak evening viewing hours, or during major global sporting events, regional internet infrastructures become heavily congested. To prevent wide-scale network blackouts, many Internet Service Providers deploy deep packet inspection (DPI) to monitor user traffic.
If they detect a massive, sustained influx of data originating from high-bandwidth media links or independent IPTV servers, they will intentionally restrict—or throttle—the speed of that specific connection line, regardless of the overall plan you pay for.
How to Identify and Defeat Throttling with a VPN
To prove whether your provider is actively throttling your streams, perform a simple diagnostic comparison:
- Run a speed test on an unmanaged connection using a site like
fast.com(which uses Netflix servers). Note the speed. - Now, run a speed test using a generic data server test tool.
- If your speed drops drastically when trying to stream video files compared to normal web downloads, your ISP is actively managing your traffic.
The VPN Fix
A Virtual Private Network (VPN) completely scrambles and encrypts all incoming and outgoing internet traffic leaving your home router or streaming device.
Without VPN (ISP monitors and throttles traffic):
[Streaming Device] —> [ISP Inspection: IPTV Traffic Detected] —> [Throttling Applied] —> Buffering
With VPN Enabled (ISP cannot read the encrypted data wrapper):
[Streaming Device] —> [ISP Inspection: Encrypted Data Wrapper] —> [Safe Passage] —> Unthrottled Speed
Because your ISP cannot see the destination or contents of your data packets, they cannot selectively apply throttling rules to your video streams. The data passes through their system completely unimpeded, restoring your full network speed.
Deployment Tip: When selecting a VPN for streaming quality optimization, look for premium services featuring specialized high-speed protocols like WireGuard. Cheap or free VPNs frequently use bloated protocols that add massive latency and bottleneck your speeds worse than the original ISP throttling did.
If you encounter configuration hurdles or routing mismatches while setting up your network environment, remember to check out the Blue Shark IPTV Help Center or contact their dedicated Support staff for tailored advice on server paths and VPN compatibility.
Section 8: Frequently Asked Questions (FAQ)
Q1: Why does my streaming quality drop dynamically during live broadcasts?
This is caused by Adaptive Bitrate Streaming (ABR) reacting to fluctuations in your network throughput. If your local Wi-Fi drops in signal strength or another device on your network begins downloading a file, the streaming app immediately requests a lower-quality video segment to prevent a complete pause or hard freeze.
Q2: Will upgrading to a faster internet speed plan completely eliminate buffering?
Not necessarily. If your buffering is caused by a weak 2.4 GHz Wi-Fi signal passing through concrete walls, a bogged-down device processor, or local ISP throttling, upgrading your incoming internet plan from 100 Mbps to 1000 Mbps will not solve the underlying issue. You must fix the internal bottlenecks first.
Q3: Is an external streaming stick better than my Smart TV’s built-in apps?
Yes, in almost all scenarios. Television manufacturers generally include low-cost, budget processors inside Smart TVs to keep manufacturing costs down. These chipsets age rapidly and are rarely updated. Dedicated external hardware (like an Amazon Firestick 4K Max, Apple TV, or Nvidia Shield) features significantly higher processing capabilities, resulting in smoother navigation and superior video decoding.
Q4: How do I know if my router is causing my video playback issues?
If you restart your router and your streaming quality improves drastically for an hour or two before degrading again, your router is likely struggling to manage its local memory table or heat output under heavy load. Consider applying QoS rules, changing wireless channels, or upgrading to a modern Mesh system.
Q5: Can a VPN cause buffering while streaming?
Yes, if you use a poor or overloaded server. While a premium VPN protects you from ISP throttling, it adds an extra hop for your data to travel. If you choose a server located across the globe, your ping will skyrocket, leading to initial buffering. Always connect to the physically closest VPN server available to minimize latency.
Conclusion: Take Control of Your Entertainment Experience
Achieving a high-definition, zero-buffering home entertainment experience doesn’t require a degree in network engineering. It simply demands a methodical, step-by-step approach to managing your digital pipeline.
By eliminating wireless interference through strategic router placement or switching to reliable Ethernet connections, unlocking bandwidth prioritization with QoS, and maintaining your streaming hardware via cache cleanups and system updates, you build a resilient environment. The hours spent optimizing your setup today will reward you with years of pristine, uninterrupted viewing quality.
Ready for Premium, Buffer-Free Streaming?
Now that your network is completely optimized, your router is configured for maximum throughput, and your streaming hardware is running lean and fast, it’s time to pair your setup with premium content delivery.
Experience pristine, high-bitrate live television, global sports, and on-demand movies exactly the way they were meant to be seen. If you encounter any unexpected network roadblocks along the way, explore our extensive library of setup guides at the Blue Shark IPTV Help Center, or reach out directly to our expert technical team through the Blue Shark IPTV Support desk for around-the-clock diagnostic assistance.
Upgrade your streaming game and enjoy the ultimate viewing experience today!